
Robot handling / other commands
Various commands are described here
Programme
Runtime after program start
The getRuntime() function specifies the runtime in seconds since the program was started.
getRuntime();Exit
The exit() method ends the program and also switches back to the main menu. In the main menu, the brakes hold the robot in its current position, which means that it consumes less power.
joints(-20.00, 0.00, -23, 90.00, -92, 15.72, 0.5);
exit();
jointsLinear(20.00, 0.00, -23, 90.00, -92, 15.72, 0.5);
The method exitRobotScript() only ends the program and the robot remains in "program execution" mode.
joints(-20.00, 0.00, -23, 90.00, -92, 15.72, 0.5);
exitRobotScript();
jointsLinear(20.00, 0.00, -23, 90.00, -92, 15.72, 0.5);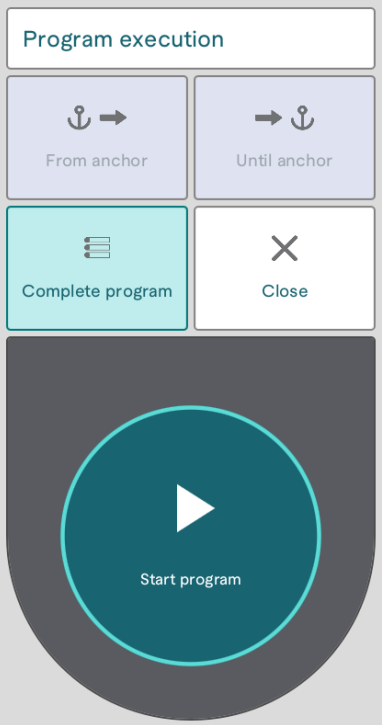
Load program from program
The function runProgram(programName) ensures that the specified program is loaded and started. The current program is terminated for this purpose. It is not possible to jump back to this point in the first program.
Example:
runProgram(‘myProgramName’);Query initialisation status
If a program is used to initialise the robot, it makes sense to query which axes have already been initialised in order to be able to react accordingly.
There are two commands for this:
isJointInitialized The command isJointInitialized(jointNumber) checks whether a specific axis has been initialised. The parameter is the number of the axis (1 to 6). The return value is a Boolean that indicates whether the axis is initialised
var joint3_initialized = isJointInitialized(3);**areAllJointsInitialized **The command areAllJointsInitialized() checks whether all axes of the robot are initialised. The return value is a Boolean that indicates whether all axes are initialised
var robot_initialized = areAllJointsInitialized();
To initialise the robot, each axis must be moved up to 20° in one direction.
Tool, TCP & Weight
Open/Close
The openGripper() / closeGripper() function opens/closes the gripper. No parameters need to be passed, nor is a result returned.
Some grippers can be opened with this function. Of course, this depends on the manufacturer of the gripper, so it does not work with every gripper.
Calculate TCP-offset
It is possible to determine the offset of the tool centre point (TCP) from four specified robot poses using the calculateTCPOffset() function. To do this, a fixed point is approached from different directions with the tool to be calibrated. The positions of the flanges should be as far apart as possible. In the best case, they form a tetrahedron around the centre point.
The respective positions of the flange are calculated from the four robot poses (joint configurations). In the following, these points, which lie on a spherical shell, are used to determine the centre of the sphere. The offset of the TCP results from the vectors between the centre and the flange positions.
The more precisely the fixed point in the centre is aimed at during calibration, the more accurate the result. It is also possible to use five instead of four robot configurations. The best four configurations are then selected automatically.
If the distances between the flange positions are too small or the points lie in a common plane, calibration is not possible and an error is output.
Using the command in horstFX
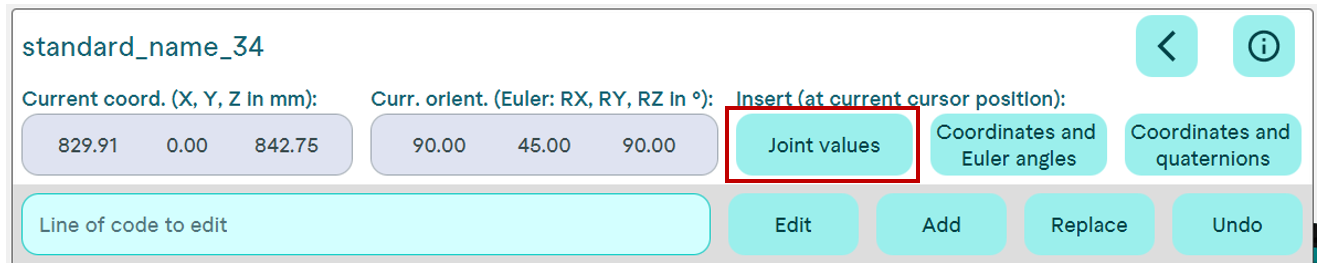
The four/five joint configurations are passed to the 'calculateTCPOffset()' function. These can be transferred from the current robot position using the 'Joint values' button.
An example of the function being used is programmed here for the H1000:
// H1000
calculateTCPOffset ({
    "calibrationJoints": [
        {"joints": [ -1.528, 25.627, 22.704, 23.386, 6.472, -71.733]},
        {"joints": [ 4.927, 53.429, -24.310, -20.278, 90.981, 103.912]},
        {"joints": [ -8.614, 48.885, -16.167, 28.605, 81.420, -181.406]},
        {"joints": [ -0.448, 37.943, -3.433, -1.424, 56.950, -42.952]},
    ]});
Display calculation result
As a result, the offset of the TCP and the standard deviation in millimetres are displayed as an info message. The values can then be used as TCP values when creating a tool (see import and create tools).
Change TCP offset
The offset of the tool can be adjusted dynamically during program execution. This adjustment is permanent. The command for this is changeToolOffset(name, x, y, z, rx, ry, rz) The command has seven parameters. The first specifies the name of the tool to be changed. The other six specify the offset in x, y, z, rx, ry and rz. x, y and z are specified in metres. rx, ry and rz are specified in Euler angles.
Example:
changeToolOffset(‘nameOfMyTool’, 0.0, 0.0, 0.1417, 0.0, 0.0, 45.0);Wait for / Pause
Pause
The sleep(timeMillis) command has only one parameter, which specifies how long the program should pause at this point. The time is specified in milliseconds. The code snippet in the example would therefore let the program sleep for 1 second (1000 milliseconds).
sleep(1000);Wait for
The waitfor(inputName, value) function waits for the transferred input until it reaches the transferred value.
- 1 Parameter: Name of the input (e.g. "INPUT_1")
- 2 Parameter: Value to be waited for (0 or 1)
waitfor("INPUT_1", 0);Coordinate system
By default, the basic coordinate system is stored for each program. Additional self-defined coordinate systems can be added via the configurations. These must already be taught in for this. If you want to change the coordinate system during the program, this is possible using the setCoordSystem() function. This is mainly used in connection with waypoints with a variable coordinate system.
setCoordSystem("Example_CoordSystem");Messages and Pop-ups
Messages
Display a hint on the control panel that does not block the program:
showHint("");Display a hint on the control panel that does block the program:
showInfo(""), showWarning("") and showError("") differ only in layout. Warning or error icons are displayed according to the name.
Pop-Up with input
It is possible to enter a value via a pop-up window:
var user_input = getUserInput("Pop-up title", "Insert Text:", "Enter a number...");The following variations exist:
| 0 Parameter: | leeres Pop-up-Fenster nur mit Textfeld |
|---|---|
| 1 Parameter: | Pop-up-Titel |
| 2 Parameter: | Pop-up title, text/description |
| 3 Parameter: | Pop-up title, text/description, example/input prompt |
Some input devices, e.g. dial gauges, output values by simulating a key input that is terminated with Enter. As no person makes the input in this case, it is not necessary to display a pop-up. As soon as the activateReadFromKeyboard() method is called, HorstFX records all keystrokes. The method readFromKeyboard() blocks the program until it registers an Enter and then returns the entire input as a string.
activateReadFromKeyboard();
showInfo(readFromKeyboard());
Check area
The function checkPoseConditions() checks whether the robot is currently in the specified area and returns true/false. The area to be checked can be specified via a map in three formats:
1. "conditionType": "CUBOID_CORNERS"
The coordinates of 4 corner points of the cuboid are specified. Their arrangement is visualised in the graphical user interface after calling the "Check area" block.
checkPoseConditions({
    "conditionType": "CUBOID_CORNERS",
    "tool": "No Tool",
    "C1": [0.0, 0.0, 0.0],
    "C2": [0.2, 0.0, 0.0],
    "C3": [0.0, 0.2, 0.0],
    "C4": [0.0, 0.0, 0.2]
}, "ex 1");
2. "conditionType": "CUBOID_XYZ"
The coordinates of a corner point are specified, followed by the distances in the x, y and z directions to the three neighbouring corners.
checkPoseConditions({
    "conditionType": "CUBOID_XYZ",
    "tool": "No Tool",
    "C1": [0.1, 0.2, 0.3],
    "x": 0.05,
    "y": 0.1,
    "z": 0.2
}, "ex 2");
3. "conditionType": "JOINTS"
A range in degrees is specified for each axis.
checkPoseConditions({
    "conditionType": "JOINTS",
    "tool": "No Tool",
    "J1": [-50.0, 20.0],
    "J2": [-5.0, 54.0],
    "J3": [0.0, 30.0],
    "J4": [12.0, 56.0],
    "J5": [-56.0, 19.0],
    "J6": [8.0, 148.0]
}, "ex 3");
The last parameter is a name that can be given to the area just specified.
Parallel processes
Parallel processes are used to execute scripts independently of each other. This allows further actions/commands to be executed in parallel with the main program.
Starting parallel processes
Parallel processes are started with the following two commands:
runThread(name, target) and runThread(name, target, cycleTime)
The parameter name specifies the name of the variable that references the parallel process. This is only required if you want to use joinThread() in the main program to wait until a parallel process has been completed.
The parameter target specifies the name of the parallel process to be executed.
If the parameter cycleTime is set, the process is executed periodically every x ms. The value for cycleTime must be at least 10.
Example:
runThread(‘myThread’, ‘anyFunction’);
//some more code...
joinThread(‘myThread’);
Waiting for a parallel process
The command jointThread(name) waits for a specific parallel process to finish:
The parameter name specifies the name of the process to wait for.
Example:
runThread(“myThread”, ‘anyFunction’);
//some more code...
joinThread(‘myThread’);
Clean-up process
Processes can be registered as clean-up processes, which are executed one after the other in the order of registration after the main program has ended. This ensures that a predefined end situation is reached. For example, this can be used to switch off a device or close the communication to a camera. A process can be registered using this command:
registerCleanUpThread(target)
The target parameter specifies the name of the process to be executed at the end of the program.
Example:
registerCleanUpThread(‘anyFunction’);Shared variables
Shared variables are used to share variables between all parallel processes and the main program. In contrast to local process variables, which are only available to the process itself, shared variables can be accessed by all parallel processes.
The method getSharedVar(key) returns the value of the corresponding variable if a value has already been set for the variable.
The method setSharedVar(key, value) sets the variable key to the value value and returns it.
The method comparedSetSharedVar(key, expected, value) returns “true” if the current value of the corresponding variable corresponds to the expected value, otherwise “false”. The value is only set to the specified value in the true case.
Example:
var myVar = 1;
setSharedVar(‘myVar’, 2);
showInfo(getSharedVar(‘myVar’));
Changing axis limitations
The axis limitation can be changed using the function setJointLimitation(name). This must first be defined in the project. The parameter name specifies the name of the axis limitation to be applied.
Example:
setJointLimitation(‘myJointLimitation’);