
Component Kit Schunk 2D Grasping-Kit with Vision Controller
This guide describes communication between the Schunk 2D Grasping-Kit and the HORST robot system. The source guide applies to horstOS and horstFX; the examples use the versions listed below.
1. Version information
The article, example programs and functions refer to:
- Robot control software version 2023.11.01
- Schunk Grasping-Kit Native Protocol V3
- Schunk Grasping-Kit software version 2.1.0
- Schunk SVC Kit commissioning instructions, edition 03.00 | 24.04.2023 | German
2. Introduction
The Schunk 2D Grasping-Kit is a solution for picking workpieces that are not presented in a fixed orientation. It combines a camera system, an application-specific gripper and an industrial PC (SVC) running SCHUNK's AI software. The software recognises objects and calculates suitable grasp points without requiring previous programming or image-processing knowledge.
This article focuses on communication between HORST and the Grasping-Kit.
3. System setup
Refer to the SVC Kit commissioning instructions from Schunk for mechanical assembly and electrical wiring. Section 4.2, Installing the power supply and SVC, describes the power and network connections.
To access the Schunk Vision Controller (SVC) web interface, the SVC and PC must be in the same IP address range. The default SVC address is 192.168.0.101. See section 4.6, Setting the IP address and starting the software, in the commissioning instructions.
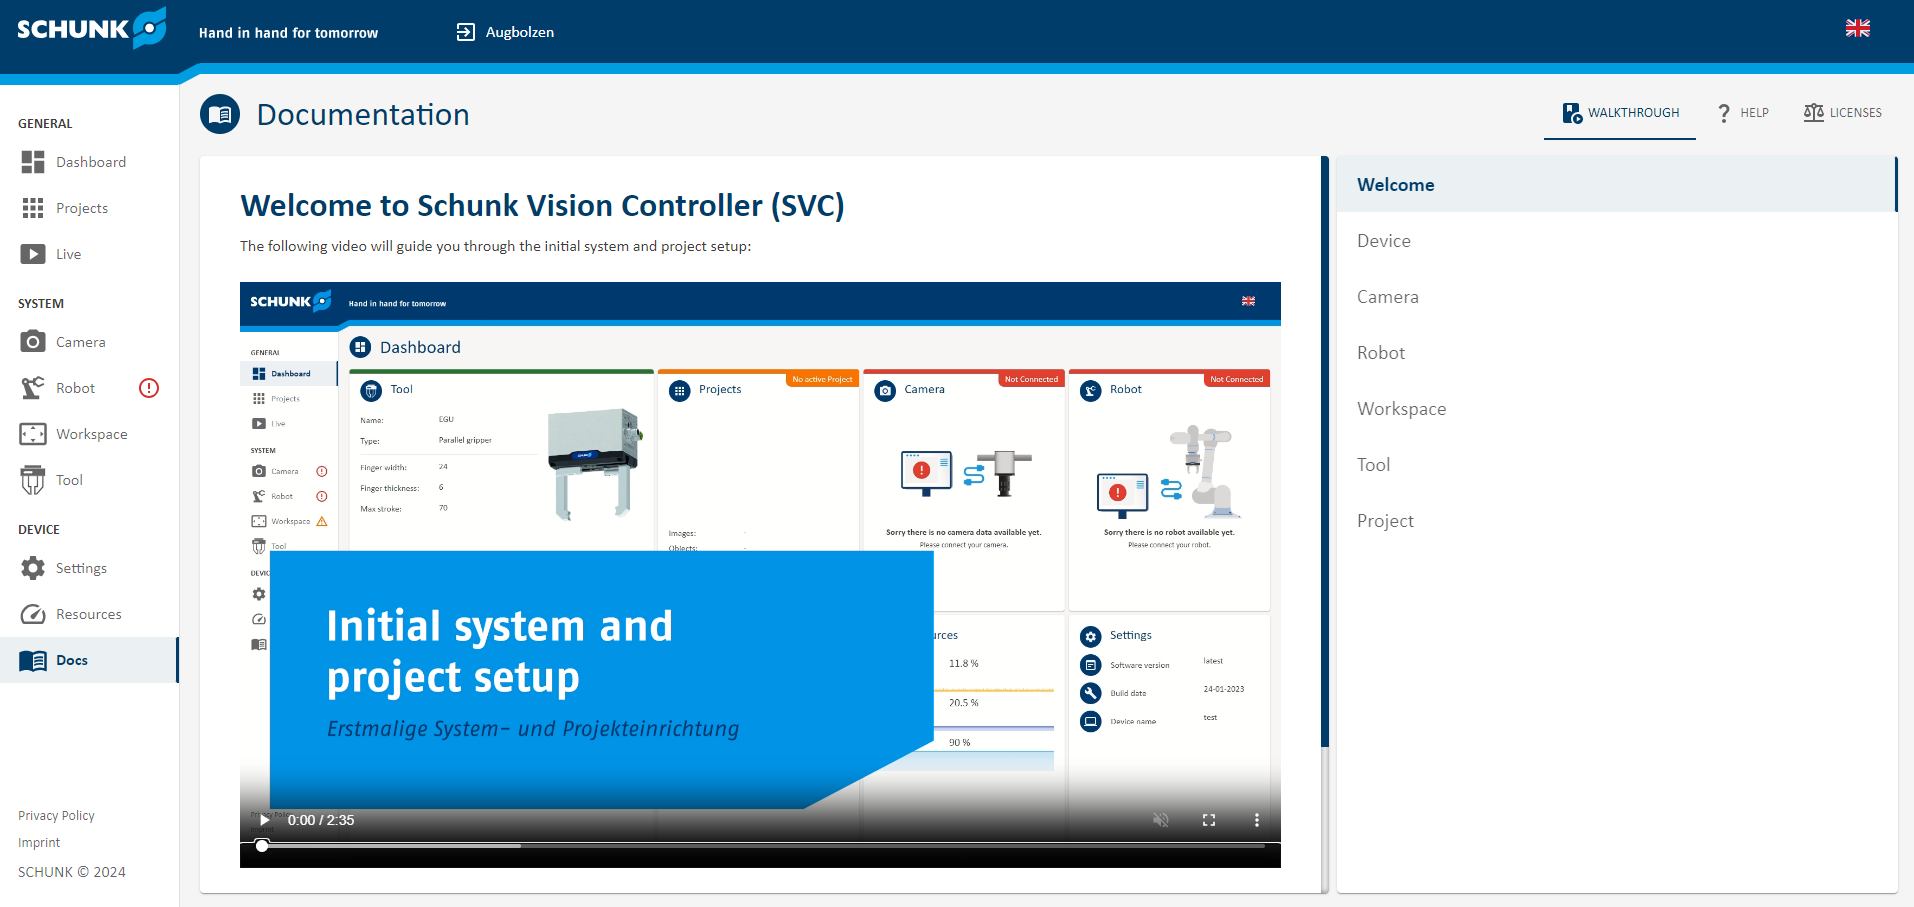
The web interface provides videos and help articles for setting up the Grasping-Kit. The Docs tab includes a video covering camera settings, calibration and project setup. During each setup step, select ? Help for further video or text guidance.
4. Communication
The robot and camera system communicate over TCP/IP. The Schunk Grasping-Kit Native Protocol V3 documentation describes the protocol and available commands. Download it from Robot → PLUGIN in the web interface.
Messages to and from the camera consist of a prefix, a header and a body. The prefix identifies the protocol version and the length of the following message data (74 bytes in protocol V3). The header identifies the message type and command purpose. The body contains additional command information.
Messages are sent in hexadecimal form. Use the data types and field positions required by the selected protocol version. The prefix must therefore contain the correct protocol identifier; the examples use V3, represented by 0x00 0x03.
Under Robot → Communication, inspect messages received and sent by the system. The Sandbox can create and send camera responses to the robot without teaching or detecting real objects.
4.1. Set the IP address
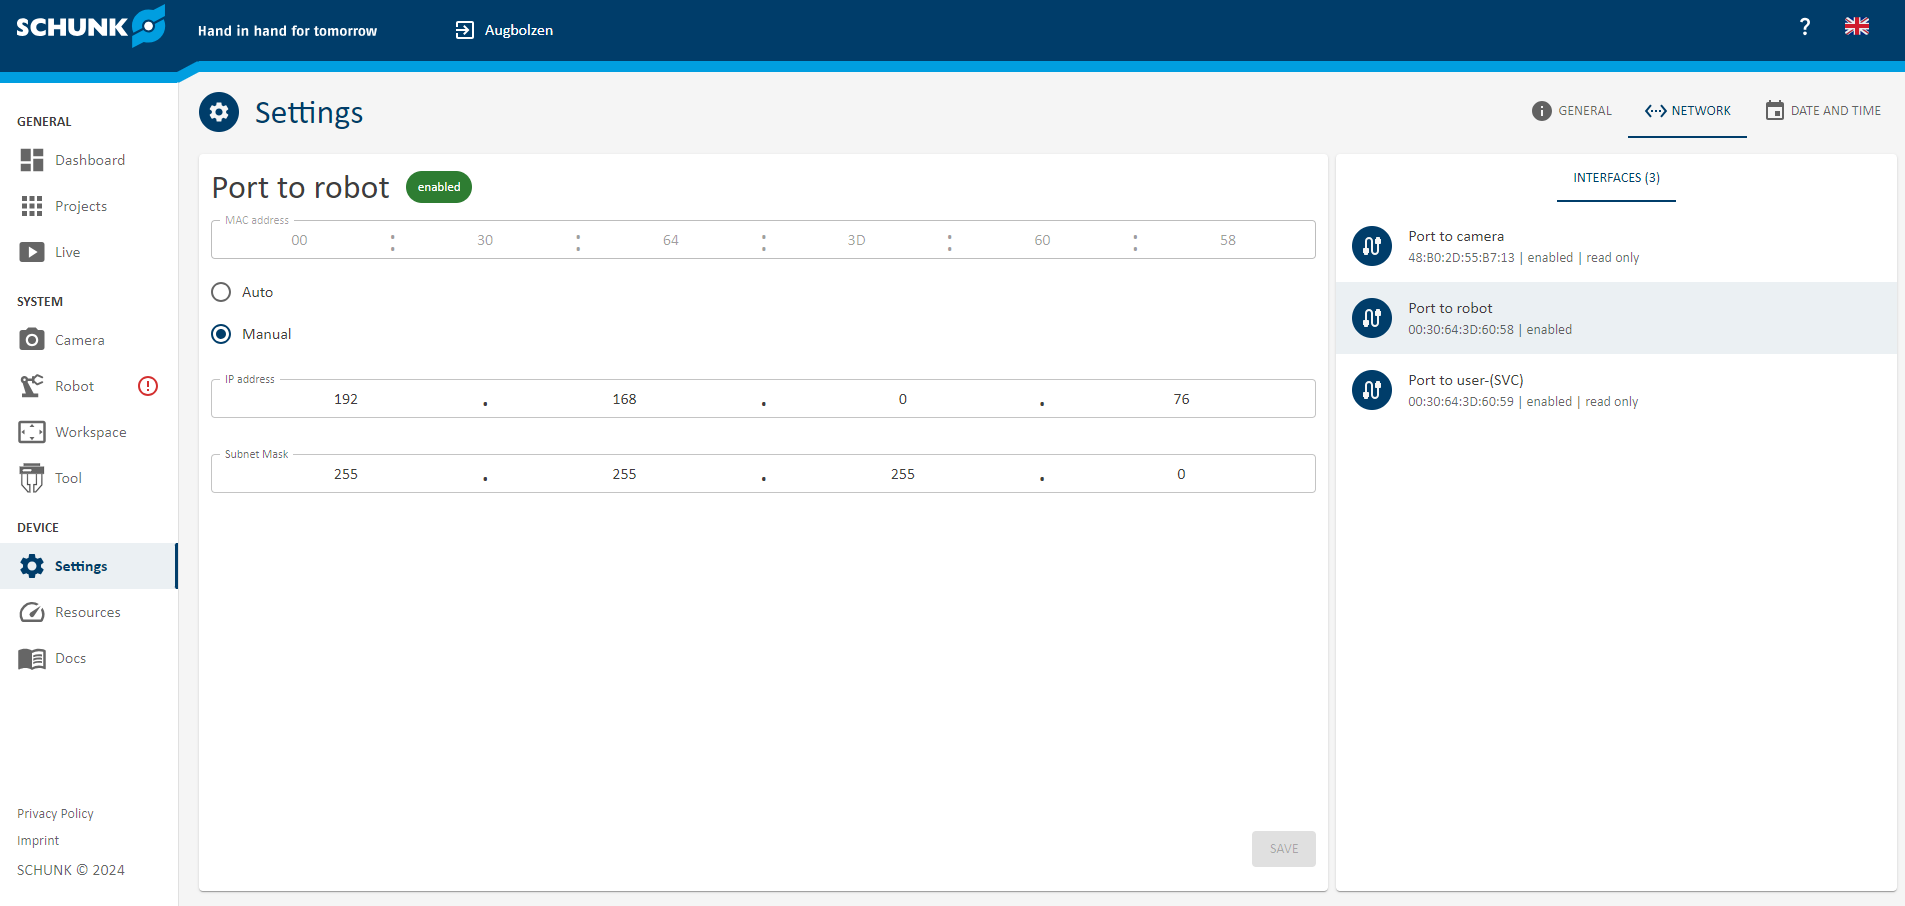
The robot and camera IP addresses must be in the same range. For the robot settings, see Change the robot's IP address.
Set the camera system's address under Settings → Port to robot in its web interface.
4.2. Establish a connection
The following function establishes a connection to the camera system from horstOS:
// Connection
var IPGraspingKit = "192.168.0.76";
var PortGraspingKit = 42001;

// connect to GraspingKit
var Socket = connect();

// connect to GraspingKit
function connect()
{
    var Socket = new java.net.Socket();
    try
    {
        Socket.connect(new java.net.InetSocketAddress(IPGraspingKit, PortGraspingKit), 10000); //10s timeout
        showHint("Connection to GraspingKit established.");
        return Socket;
    }
    catch(e)
    {
        showError("A connection to the GraspingKit could not be established!");
        exitRobotScript();
    }
}
4.3. Send information to the camera system
Messages must follow the Schunk Native Protocol V3 syntax and are sent as hexadecimal data. For example, build a request for the camera system's status as follows:
// build hex request
var Request = [0x00, 0x03, 0x00, 0x00, 0x00, 0x4A, 0x01, 0x00, 0x00, 0x02];

// fill request message to specified size with 0x00
for (var i = 10; i<80; i++)
{
      Request[i] = 0x00;
}
Send the command with this function:
// send it to GraspingKit
writeMessage(Socket, Request);

// send raw data via socket
function writeMessage(socket, Message)
{
        var jMessage = Java.to(Message,"byte[]");
        var dout = new java.io.DataOutputStream(socket.getOutputStream());
        dout.write(jMessage);
        dout.flush();
}
4.4. Read information from the camera system
Use the following function to read a camera response:
// read the response
var Response = readMessage(Socket);

// read the raw message
function readMessage(socket)
{
    // set timeout
    socket.setSoTimeout(20000);

    try
    {
        var ByteArray = Java.type("byte[]");
        var dIn = new java.io.DataInputStream(socket.getInputStream());

        // read the Prefix to get the length of the remaining data message
        var Prefix = new ByteArray(6);
        dIn.readFully(Prefix, 0, Prefix.length); // read the Prefix
        var msgID =  Prefix[0];
           var dataLength = (Prefix[5] & 0xFF) + (Prefix[4]  & 0xFF) + (Prefix[3] & 0xFF) + (Prefix[2]  & 0xFF);
        //showInfo(dataLength);

        // read the remaining data message
        var Message = new ByteArray(dataLength);
        dIn.readFully(Message, 0, Message.length);
        var Data =  Java.from(Message);

        return {Prefix: Prefix, Data: Data}
    }
    catch(e)
    {
        showError("Timeout while reading the message from the camera. The program is aborted due to safety reasons.");
        // close communication sockets and exit robot script
        closeRobotScript();
    }
}
The function first reads the prefix using its known length. It then uses the remaining message length specified in the prefix to read the complete response.
The following function displays the message as a hexadecimal string:
showInfo(toHexString(Response.Data));

// convert message to hex string
function toHexString(byteArray)
{
        var s = '';
        byteArray.forEach(function(byte)
        {
            s += '0x' + ('0' + (byte & 0xFF).toString(16)).slice(-2) + " ";
        });
        return s;
}
4.5. Close the connection
Close the socket connection when the program is aborted or an error occurs:
// close sockets
Socket.close();
4.6. Complete example function
A response to a command indicates whether the system processed it successfully. After sending a command, read and interpret the response:
// read the response
var Response = readMessage(Socket);

// wrap byte array into buffer
var bb = java.nio.ByteBuffer.wrap(Response.Data).order(java.nio.ByteOrder.BIG_ENDIAN);

// break down telegram for separating the GraspingKit response
var Index = breakDownTelegram();

// get byte at given index
var Success = bb.get(Index.ReplyCode);    // reply code
var State = bb.get(6);                    // state

if (Success != 1.0)
{
    showError("Receiver encountured a failure processing the getState message.");
}

// break down telegram for separating the GraspingKit response
function breakDownTelegram()
{
    // index via protocol documentation
    var CommType = 0;        // uint8 = 1 Byte
    var ReplyCode = 1;       // uint8 = 1 Byte
    var ReplyCounter = 2;    // uint8 = 1 Byte
    var MsgType = 3;         // uint8 = 1 Byte
    var Body = 4;            // size depends on "Message Type"

    return {CommType:CommType, ReplyCode:ReplyCode, MsgType:MsgType, Body:Body}
}
The following complete function reads and interprets the camera system's status:
// get the state of GraspingKit
function getState()
{
    // build hex request
    var Request = [0x00, 0x03, 0x00, 0x00, 0x00, 0x4A, 0x01, 0x00, 0x00, 0x02];
    // fill request message to specified size with 0x00
    for (var i = 10; i<80; i++)
    {
        Request[i] = 0x00;
    }
    // send it to GraspingKit
    writeMessage(Socket, Request);

    // read the response
    var Response = readMessage(Socket);
    //showInfo(toHexString(Response.Data));

    // wrap byte array into buffer
    var bb = java.nio.ByteBuffer.wrap(Response.Data).order(java.nio.ByteOrder.BIG_ENDIAN);

    // break down telegram for separating the GraspingKit response
    var Index = breakDownTelegram();

    // get byte at given index
    var Success = bb.get(Index.ReplyCode);    // reply code
    var State = bb.get(6);                    // state

    if (Success != 1.0)
    {
        showError("Receiver encountured a failure processing the getState message.");
    }
    else
    {
        switch (State)
        {
            case 1.0:
                showInfo("State GraspingKit: The server is initializing.");
                break;
            case 2.0:
                showHint("State GraspingKit: The server is operational an ready to serve requests.");
                break;
            case 3.0:
                showWarning("State GraspingKit: The server has stopped operating.");
                break;
            case 4.0:
                showError("State GraspingKit: The server has encountered a critical error!");
        }
    }
}
5. Functions
The example provides the following communication functions:
getProtocolVersion(): Returns the most recent protocol version supported by the camera system.getState(): Returns the system status.registerRobot(): Registers the robot.setProject(): Activates the selected project.takeSnap(): Triggers a new image acquisition.getGrasp(): Returns object-position information.provideGraspfeedback(Feedback): Reports the result of the gripping process to the camera system.getObjectCount(): Returns the number of objects detected in a scene.sendCurrentRobotPose(): Sends the current robot pose to the camera system.
After triggering image acquisition with takeSnap(), the next command sent to the camera system must be getGrasp(). Conversely, a trigger must precede each getGrasp() request. Other commands sent to the camera between those calls can prevent correct interpretation. Robot actions and commands to other peripheral devices may take place between them.
The example program available in section 7 contains all the functions listed above.
5.1.1. The takeSnap() and getGrasp() functions
The examples below explain takeSnap() and getGrasp(). The other functions follow the same approach. Refer to Schunk's Native Protocol V3 interface documentation for further function and parameter details.
A trigger request requires the following parameters:
GraspMode:3for automatic grasp planning;2for any of the taught grasps;1to allow only the active grasp.ClassID: Target-object class ID;0allows a random object or any object.Tool:1for a parallel gripper gripping externally;2for a parallel gripper gripping internally;3for a contact gripper such as a vacuum or magnetic gripper.
// Camera Data (described in simple protocol v3 description)
var GraspMode = 2;       // 3 = auto grasp: any_grasp model - free grasp-planning, 1 = aktive grasp: grasp must match target object's active grasp definition, 2 = any grasp: grasp must match any of target object's grasp definition
var ClassID = 0;         // class id of target object, 0 = random object
var Tool = 1;            // 1 = exterior: Exterior two-finger parallel gripper, 2 = interior: Interior two-finger parallel gripper, 3 = contact: suction, magnet or adhesion with a contact area

// trigger camera and request a grasp
takeSnap();

// trigger camera and request a grasp
function takeSnap()
{
    showHint("Taking snapshot and getting grasp");

    // convert integer to needed format
    var ConvGraspMode = java.nio.ByteBuffer.allocate(1).put(GraspMode).array();
    var ConvClassID = java.nio.ByteBuffer.allocate(2).putShort(ClassID).array();
    var ConvTool = java.nio.ByteBuffer.allocate(1).put(Tool).array();

    // build hex request
    var Request = [0x00, 0x03, 0x00, 0x00, 0x00, 0x4A, 0x01, 0x00, 0x00, 0x10, 0x00, ConvGraspMode[0], ConvClassID[0], ConvClassID[1], ConvTool[0], 0x01];
    // fill request message to specified size with 0x00
    for (var i = 16; i<80; i++)
    {
        Request[i] = 0x00;
    }

    // send it to GraspingKit
    writeMessage(Socket, Request);
}
After triggering, getGrasp() returns the information needed to grip the object:
// get grasp data
function getGrasp()
{
    showHint("Getting grasp data");

    // read the response
    var Response = readMessage(Socket);
    //showInfo(toHexString(Response.Data));
    LOG.info(toHexString(Response.Data));

    // wrap byte array into buffer
    var bb = java.nio.ByteBuffer.wrap(Response.Data).order(java.nio.ByteOrder.BIG_ENDIAN);

    // break down telegram for separating the GraspingKit response
    var Index = breakDownTelegram();

    // get byte at given index - Index without prefix -> index 6 lower than in protocol v3 doc
    var ReplyCode = bb.get(Index.ReplyCode);    // reply code
    var ReplyCounter = bb.get(2);               // reply counter
    var MsgType = bb.get(3);                    // message type
    var RespGraspMode = bb.get(7);              // GraspMode
    var ObjectClass = bb.getShort(8);           // object class
    var ObjectInstance = bb.getShort(10);       // object instance
    var Stroke = bb.getInt(12)/1000;            // distance between both fingers to set before approaching the object
    var AngleOffset = bb.getInt(16)/1000;       // angular offset in microedges beteween object model and robot flange at position zero
    var CenterOffsetX = bb.getInt(20)/1000;     // translation X in micrometers from object center to grasp point in robots base coordinate frame
    var CenterOffsetY = bb.getInt(24)/1000;     // translation Y in micrometers from object center to grasp point in robots base coordinate frame
    var CenterOffsetZ = bb.getInt(28)/1000;     // translation Z in micrometers from object center to grasp point in robots base coordinate frame
    var RespTool = bb.get(32);                  // type of tool used in the request
    var RespPoseFormat = bb.get(33);            // pose format
    var GraspPoseX = bb.getInt(34)/1000;        // position X
    var GraspPoseY = bb.getInt(38)/1000;        // position Y
    var GraspPoseZ = bb.getInt(42)/1000;        // position Z
    var GraspPoseQx = bb.getInt(46)/1000;       // quaternion qx
    var GraspPoseQy = bb.getInt(50)/1000;       // quaternion qy
    var GraspPoseQz = bb.getInt(54)/1000;       // quaternion qz
    var GraspPoseQw = bb.getInt(58)/1000;       // quaternion qw
    var ObjectCount = bb.getShort(62);          // number of all detected objects
    var CandidateCount = bb.getShort(64);       // number of detected objects of the requested class id

    // If Error
    if (ReplyCode == 2.0)
    {
        showError("Receiver encountured a failure processing the getGrasp message!");
        var NoObj = 1;

        return {NoObj:NoObj};
    }
    // If no success
    else if (ReplyCode != 1.0)
    {
        switch (ReplyCode)
        {
            case 3.0:
                //showInfo("The server could not find the requested Object!");
                showHint("The server could not find the requested Object!");
                break;
            case 4.0:
                //showInfo("The server could not find a valid grasp!");
                showHint("The server could not find a valid grasp!");
                break;
            case 5.0:
                showError("The object class is either invalid or does not exist!");
        }

        var NoObj = 1;

        return {NoObj:NoObj, ObjectCount:ObjectCount, CandidateCount:CandidateCount};
    }
    // If success
    else
    {
        // convert values
        GraspPoseX = GraspPoseX/1000;
        GraspPoseY = GraspPoseY/1000;
        GraspPoseZ = GraspPoseZ/1000;
        GraspPoseQz = -GraspPoseQx/1000;
        GraspPoseQy = GraspPoseQy/1000;
        GraspPoseQx = GraspPoseQz/1000;
        GraspPoseQw = GraspPoseQw/1000;

        //showInfo("GraspPoses in m:\n" + "X: "  + GraspPoseX + " Y: "  + GraspPoseY + " Z: "  + GraspPoseZ
        //    + "\nQx: "  + GraspPoseQx + " Qy: "  + GraspPoseQy  + " Qz: "  + GraspPoseQz + " Qw: "  + GraspPoseQw);

        // get normal surface
        var Normal = getSurfaceNormalByQuaternion(GraspPoseQx, GraspPoseQy, GraspPoseQz, GraspPoseQw);
        var NoObj = 0;

        return {Normal:Normal, NoObj:NoObj,
                GraspPoseX:GraspPoseX, GraspPoseY:GraspPoseY, GraspPoseZ:GraspPoseZ,
                GraspPoseQx:GraspPoseQx, GraspPoseQy:GraspPoseQy, GraspPoseQz:GraspPoseQz, GraspPoseQw:GraspPoseQw,
                Stroke:Stroke, ObjectCount:ObjectCount, CandidateCount:CandidateCount,
                CenterOffsetX: CenterOffsetX, CenterOffsetY: CenterOffsetY, CenterOffsetZ: CenterOffsetZ}
    }
}
The camera counts objects in ObjectCount and CandidateCount even if they cannot be gripped, for example because the gripper jaws would collide with other objects or the ROI. If no valid grasp is found for any object in the scene, however, both values are returned as 0. Use getObjectCount() to obtain the number of detected objects in that case.
The camera and robot coordinate systems must agree on rotation conventions. The source example uses the following quaternion assignment:
GraspPoseQz = -GraspPoseQx; GraspPoseQy = GraspPoseQy; GraspPoseQx = GraspPoseQz; GraspPoseQw = GraspPoseQw;
The negative sign for GraspPoseQz depends on the configured gripper TCP and may therefore vary.
The function returns only the variables required by the example. Add other required variables to the return statement in the same way as the existing values.
Call and use getGrasp() as follows:
// get grasp data
GraspData = getGrasp();

// grasping position
move({
       'Coord': 'CARTESIAN_BASIS',
        'MoveType': 'LINEAR',
        'PoseRelation': 'ABSOLUTE',
        'anyconfiguration': false,
        'speed.ratio': 0.7,
        'target': {'xyz+quat': [GraspData.GraspPoseX, GraspData.GraspPoseY, GraspData.GraspPoseZ, GraspData.GraspPoseQx, GraspData.GraspPoseQy, GraspData.GraspPoseQz, GraspData.GraspPoseQw]},
         'tool': 'Schunk EGK25'
}, "ApproachPos");
6. Example program
The program available in section 7 contains all functions listed in section 5, although it does not call every function.
It first connects to the camera system and registers the robot. It then activates project 1 and requests the system status. In a continuous loop, it triggers the camera and places an object at a specified position. After placing the object, it triggers the camera again and reads the new object coordinates at the localisation position. If no object or valid grasp is found, it waits one second and triggers the camera again.
7. Downloads
7.1. SVC Kit commissioning instructions
SVC Kit commissioning instructions — German PDF